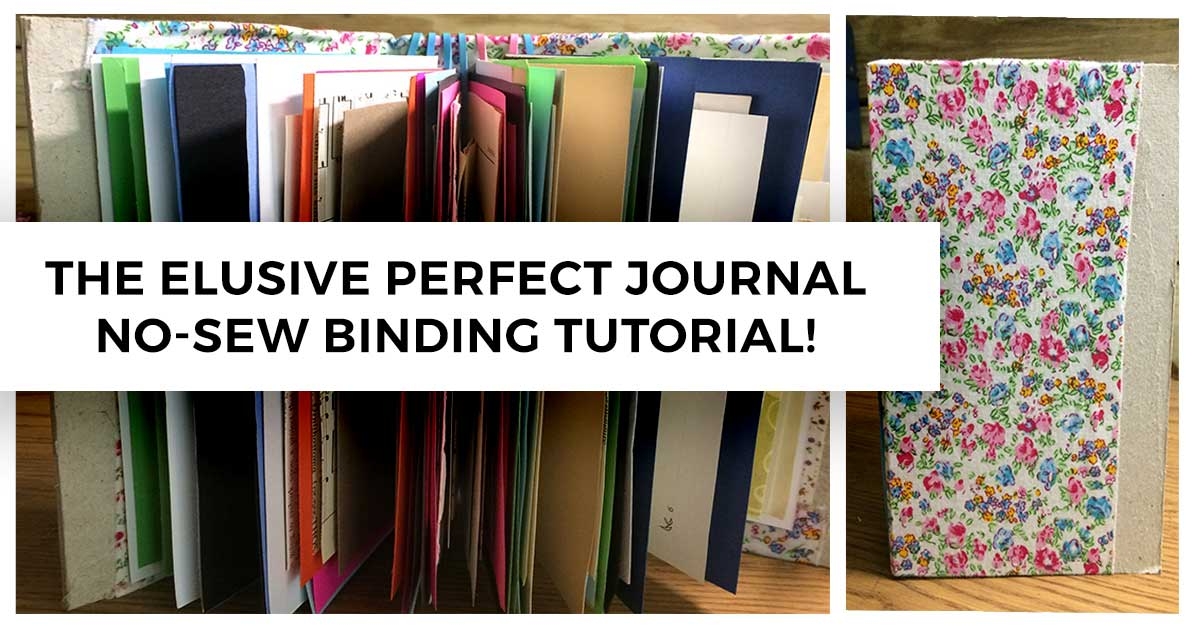
I *think* I may have finally found the elusive perfect no sew DIY Journal, so I’m going to share a little video tutorial that shows the process!
The best part? This is a NO-SEW journal, which means you don’t need to worry about jabbing and poking your fingers while trying to put together the signatures! Awesome, right?
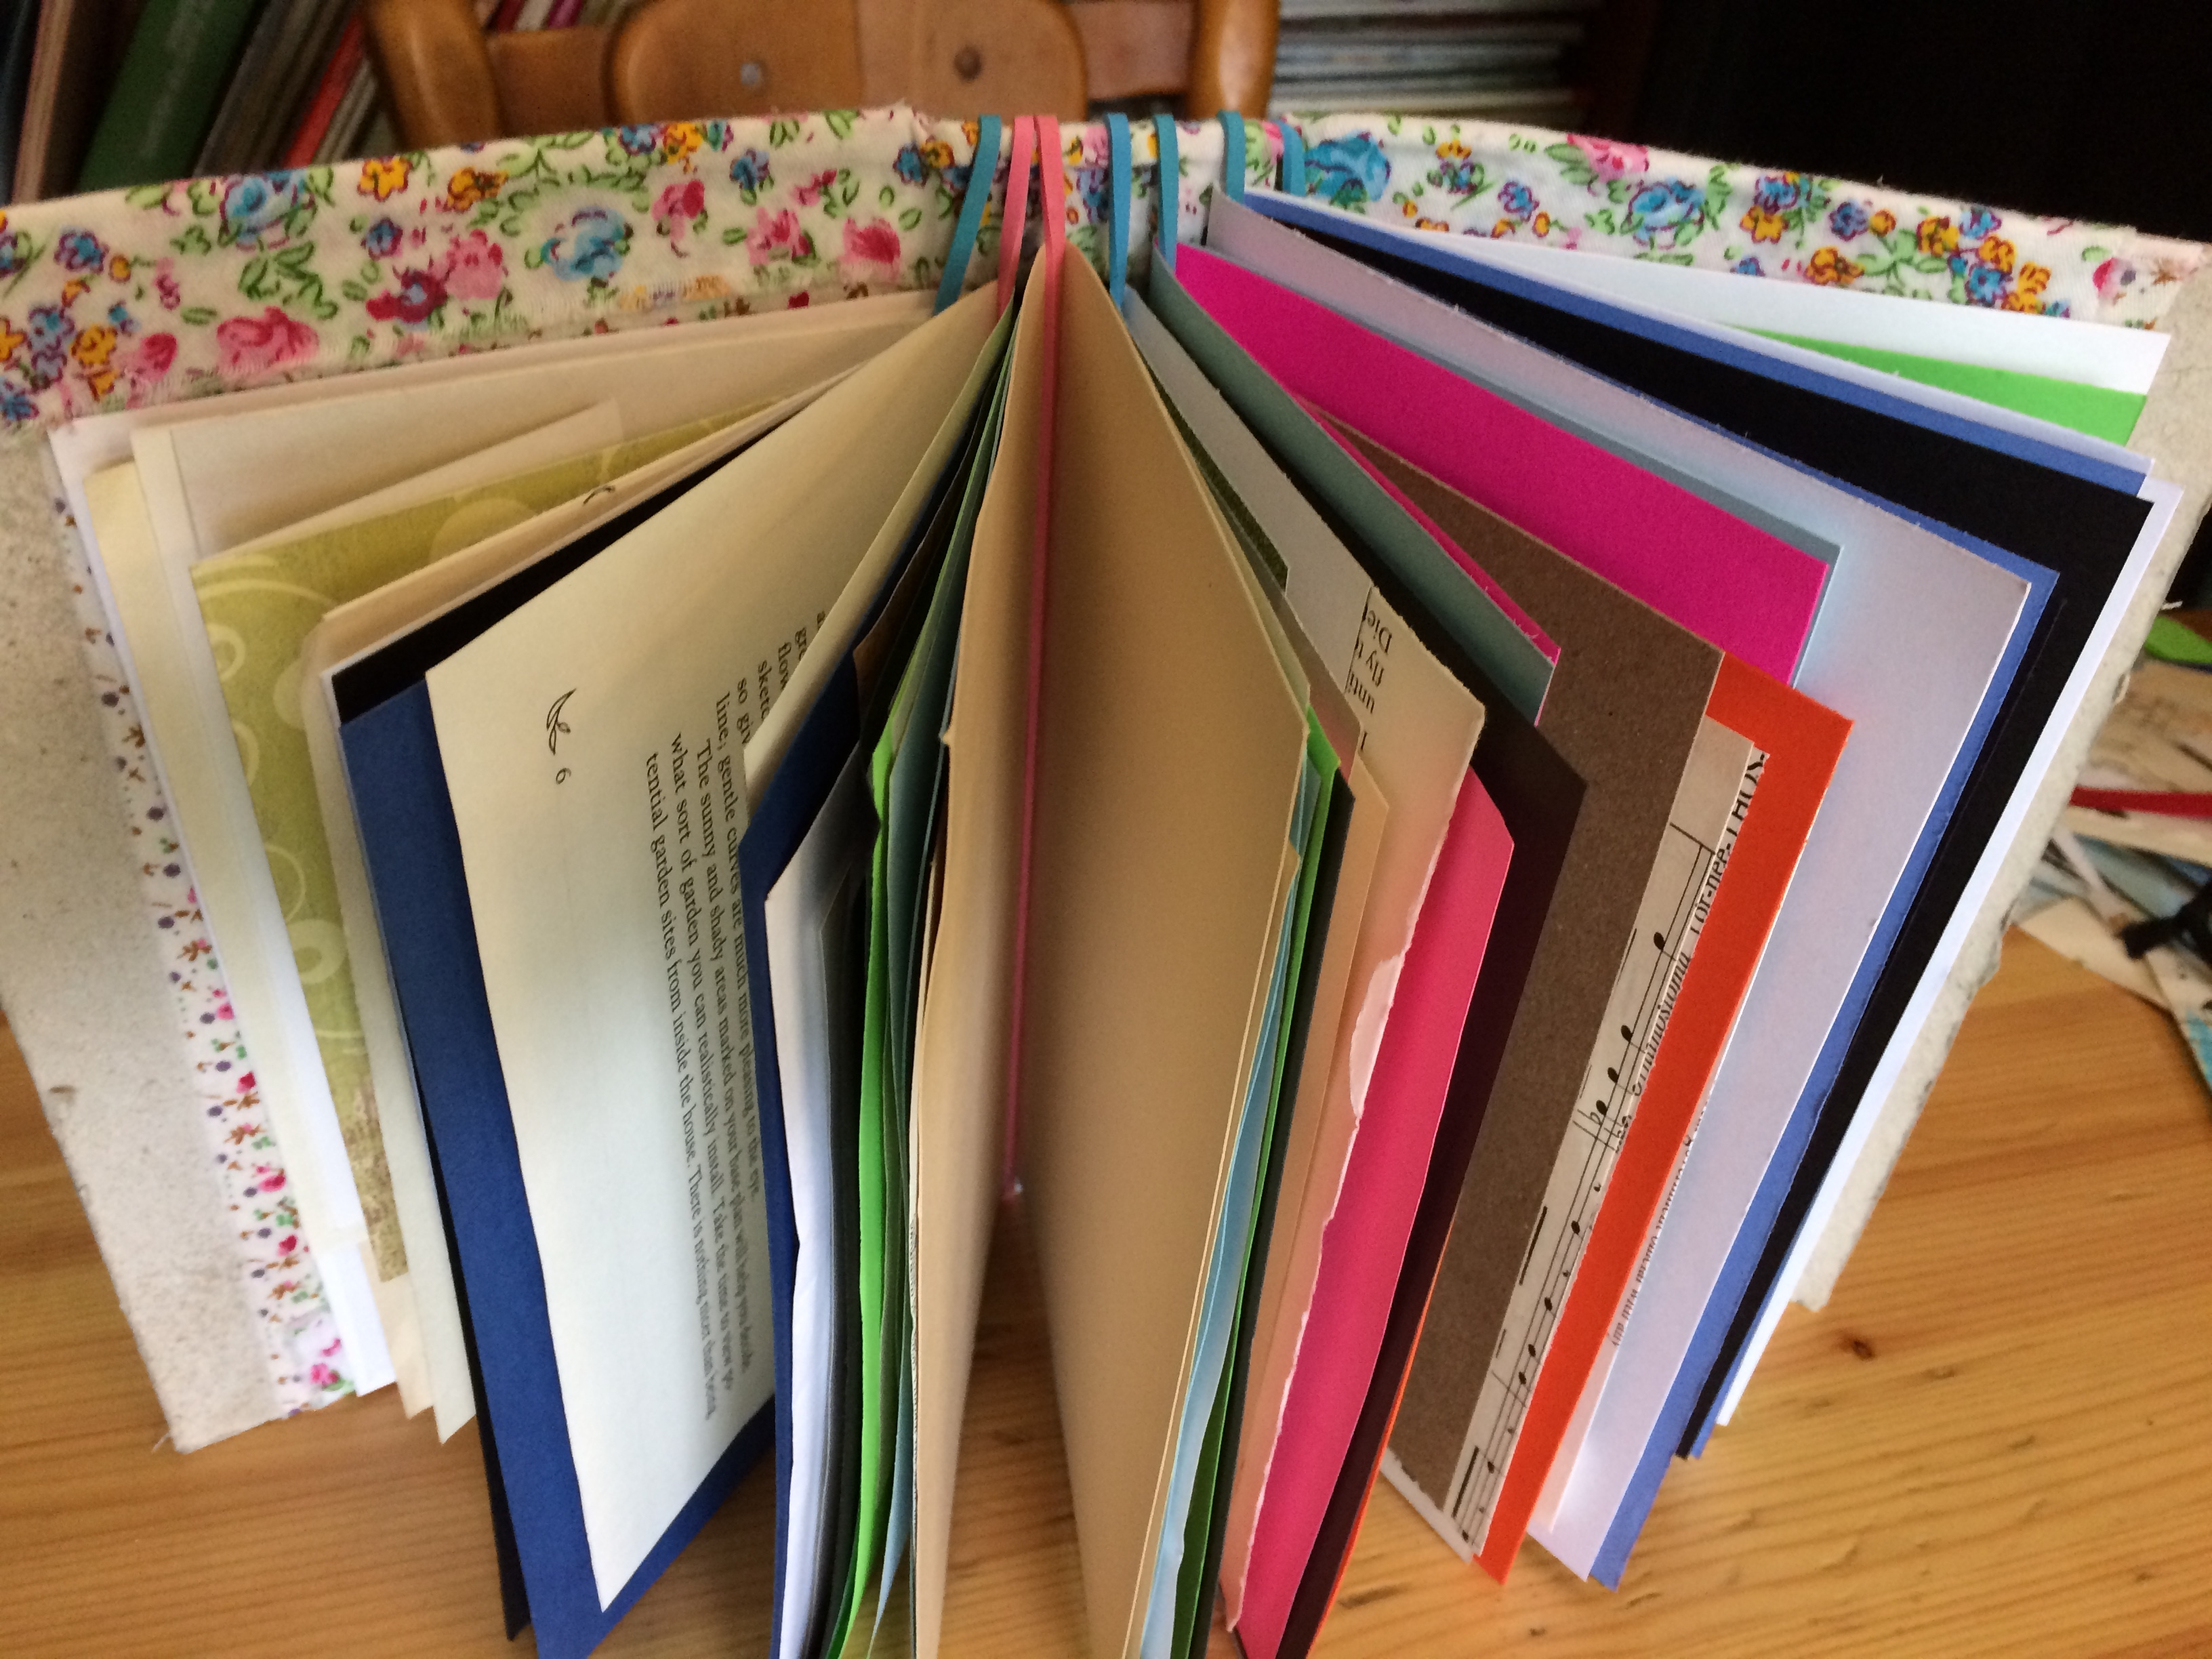
This style of journal in my video is a classic junk journal, using up little bits of whatever and everything and anything I happen to have. Of course, you can always use your own materials that you like to use. If you want something a little cleaner, you can definitely use your favorite watercolor paper or blank card stock!
The journal uses rubber or elastic bands to create a faux midori style travelers notebook – so yes, that’s right – you don’t need to sew the signatures in any way! The secret is to use rubber or elastic bands to secure the pages!
Here are the Supplies You’ll Need to Make This Junk Journal
Spray Adhesive: You do not HAVE to use spray adhesive – but boy does it make the process a lot easier and less messy! You can substitute with a variety of things, such as regular tacky glue for example.
Cardboard or Book Board – This is for the cover. I use old book covers, but you can use thick cardboard or chipboard instead. Use what you have – this is a junk journal afterall!
Fabric: Cut your fabric to be about 1″ around bigger the size of your book covers. In my video I show below, I didn’t worry too much about the fabric being the right size, since I plan on adding more to the cover eventually. You’ll need two pieces – one for the front, and one for the back.
Large Rubber Bands or Elastic Hairbands: I used 5 file-folder size rubber bands for this journal prototype. I really also like using Goody Elastic hairbands – the thin big kind that you can find in the hair accessories aisle at the store. You can also order these online at Amazon.
Misc. Papers: The best part of this journal is you can reposition the papers easily if you’d like. Since it is only the rubber bands that hold the papers in place, you don’t have to worry about wanting to move papers around later. I use an assorted size of papers – make sure that you have papers big enough that they can be folded in half.
Most of the supplies and tools I use can be found at just about any major retailer or craft store.
The closest store that sells anything like craft supplies near where I live is Wal-mart, and usually I can find some fabric scraps as well as the spray adhesive in the art department.
But you don’t have to buy anything. You can of course also check out different thrift shops for materials or even use what you might have around your own house!
The dollar store is also a great place to find those elastic hair bands! You can also use smaller hair bands as well to create mini-books.
Want to watch this tutorial on YouTube? You can find it here.
Step by Step Instructions for Making The Elusive Perfect No-Sew Junk Journal

The video on this page goes over the entire process of the journal step by step, so definitely recommend watching that in full if you want detailed instructions!
However, I’ve also included the written instructions here as well, because I know sometimes it’s nice to have both!
The whole process is pretty straightforward. Basically you cut out the covers, attach with fabric, fold your papers, and then insert each paper into the rubberbands.
Easy peasy – I spent the most time sorting through all of my papers!
Step 1: Cut & Measure the Cover Materials
The first thing to do is to cut 2 pieces of fabric to the desired size, and also cut the book board as necessary.
For the book cover, you will need three pieces – a front and a back that are the same size, and then the piece for the spine.
The spine will be the thickness of the journal – so you would probably want to make this at least 1″ wide – and there’s really no limit on how wide you can go!
Of course, you don’t HAVE to make the fabric go all around the entire cover – you could very easily do like I did in the video and just use a small piece of fabric.
If you plan on eventually decorating & doing something different with the cover anyways, you definitely don’t need to have the fabric wrap all around.
Step 2: Create the Cover

The Cover is made relatively easily simply by laying down the piece of fabric and then using the spray adhesive to attach it to the book board.
Simply spray the boards, and press down onto the first piece of fabric. Next, spray the bookboard and then press on the second piece of fabric.
Once you have that, you simply need to then fold over the fabric on the top and bottom and use the spray adhesive to keep it in place.
Spray adhesive dries pretty quick, but you definitely want to make sure it is completely dry before moving onto step 4! Don’t worry, Step 3 is lots of fun and will definitely keep you busy!
Step 3: Prepare the Pages & Signatures

While the cover is drying, it’s time to prepare all of your pages to create signatures. A signature is simply a group of papers that are folded together.
Each piece of paper we use in this journal will be folded in half. This is good to know when you are cutting the pages so you can have a good idea of what size to use.
So, for example, if making a 6″ x 9″ journal, you would want to use papers that measure somewhere around 11 x 8.5″, so that when they are folded, they would be about 5.5″ wide and 8.5″ tall.
Most standard sheets of paper fit into this size – Scrapbooking paper is also popular in a lot of junk journals because many varieties come in 12 x 12″ size and can be cut to the desired size.
It is helpful to cut these papers to a similar size, but of course is not required – so feel free to mix and match all sorts of different sizes and shapes to your liking!
Since I was working with a lot of different types of papers, I simply trimmed them as necessary and folded in a couple of others that were smaller.
To fold the papers, it is helpful to use a butter knife to press down on the folds. A nice clean fold will give you better results!
Once you have all the papers folded, Group all of the folded papers into sets of 6 pages or more. You’ll want a total of 5-7 groups of folded papers – these are your signatures!
Step 4: Insert the Signatures
 Here is where the magic really happens – No Sewing Needed!
First you take your elastic bands and wrap them over the spine of the book. Then, all you need to do is simply insert the signatures between the elastic bands.
It comes together super quick and easy! The best part? If you don’t like where something is, it’s very easy to simply slide out any piece of paper and move it around!
Resources for Supplies Used in This Journal Tutorial
If you have a hard time finding the supplies however, I’ve listed links to all of the materials to purchase from Amazon.
Elmer’s Spray Adhesive: This is the same spray adhesive I used in the video. It makes putting together journals so much easier!
Goody Elastic Headbands: These elastic headbands come in lots of color options! They are the perfect size for a 6″x9″ book/journal. Or…if you’d rather use rubber bands, you can find File Bands on Amazon as well.
The possibilities are endless with this style of journal!
There are so many things you can make with this type of journal binding. Since it doesn’t require sewing or sharp objects, it is perfect for kids to make also!
I hope you enjoy this journal, and I’d love to see what you make! Join our Facebook Group to share your latest junk journal creations!
Have questions? Need some help understanding how to make this journal? I’m always happy to answer your questions below or join us in our community Facebook group!
Join our facebook group!

Share what you’re creating and working on, ask questions + connect with over 4000 creative artjournalists for inspiration + ideas!
Awesome and very thought through especially the ability to move pages/signatures. This is my first JJ and I’m a lot less stressed and more excited to do my JJ. THANKS bunches!
It’s so great to know you can move all the pages anytime. Less pressure! 🙂
that’s a great idea. I can’t wait to make my own.
It’s so fun!
I’m so glad to have a journal my granddaughter can create herself – she lives thousands of miles away, but we had fun creating a travelers’ notebook when she was here with me. This will also keep her busy collecting all the junk paper in the house!!
That’s great that you and your granddaughter could make one together! 🙂
This is a great idea especially for a personal gift for a child or someone sick or in the hospital or Valentine’s or whenever. Cannot wait to try myself….😁
Cant wait to make my first one thank you so much
I think this is pretty awesome. While watching your Youtube video, I thought that this would be a great way to collect and display all of the magazine pages or other papers that I collect as inspiration! So my goal wouldn’t be to write in it, but to use it as an inspiration journal! Thanks for such a great idea!
That’s a great idea Lisa! Have fun creating! 🙂
This relieves all the pressure of having to sew the signatures into the book!!!! Thank you, thank you, thank you!
Yes, yes, yes! 🙂 You are very welcome!
Oh my goodness. This is the first journal I think I can actually accomplish. I’ve been looking around and found some I liked – but didn’t want to sew. I have tons of scrapbook paper left over from when I was a teacher and I am so glad I didn’t toss them out or give them away. Thank you so much!
Hooray! That is what prompted me to try to create this journal in the first place – the sewing part for other journals can seem so intimidating. This is a great journal to make for any age, ability & skill level! Glad it inspired you! 🙂
This is my favorite method. I have made several journals this way. Love it!
This is my favorite method. I have made several journals like this. Simply love it. Now I collect all kinds of things to make journals for my friends and family.
That’s awesome, enjoy!!!
Hmmm…this might work well as a way to “test drive” various page and signature combinations that I might sew in place later!
I do it all the time, saves from a lot of mistakes later down the road during the binding process!
I’m so glad this showed up on my Pinterest feed! This is brilliant! I’m always for “working smarter, not harder.” Thanks for sharing your great ideas!
I’m glad you enjoyed it Malinda!
Bruh such amazing work! I love it sm! One spot to bind all the chaos in my head…Loved it really🧡🧡😍
Thank you!! I am crazy THRILLED to have found this on my feed! Question: Will I be able to paint on a page in the journal? (“doodling” w/ markers, acrylics/watercolors. Maybe clamping the page while it dries? Help!?) I hope so!! This is THE journal method I’ve been looking for!
Hi Jess, you can definitely paint + doodle in the journal! If you are planning to paint and use wet media, you will want to make sure you either double up your papers (glue one piece to another to create a thicker sheet) or use a heavier paper like Canson mixed media paper or watercolor paper. The most important thing is to make sure you let the paints 100% fully dry before trying to write and draw over paint and that you don’t close the book if the pages are still wet/tacky. Putting wax paper between your painted pages temporarily can help prevent this if you’re not able to keep your book open to dry. Hope that helps and f you have any other questions about art journaling just ask! 🙂
Is there an issue with the elastics disintegrating or drying out/cracking iver time? Ir is there a soecific kind of elastic that doesn’t do that? Neat idea!
Hi Therese! Most elastic bands can last for decades as long as they aren’t exposed to direct sunlight or extreme temperatures. Any type of journal/paper is going to become a bit fragile after many, many years, though they do many different kinds of rubber bands – higher quality ones will last longer. If you are making an heirloom quality journal and are worried about the elastic bands breaking over time, you can always use ribbon, twine or even yarn instead to tie around the sections or you could opt for sewn binding. Hope that helps!
inspired in this tutorial I made my first junk mini journal with things I had at home.
Thank you so much, the tutorial is amazing and easy to follow
https://prnt.sc/EneMqGHtFbXI
(I don’t know if can show the pic)
This is a great idea. I have been struggling with how to make a junk journal without sewing. I am going to start my junk journal today. Thank you so much ❤️. Ginny Barney
Thanks Ginny I’m glad it’s helpful for you!
How do you hide the bands from showing on the spine of the jj?
Hi Dana! I would probably cover them up with a piece of fabric on the outside of the spine that connects to the covers – you want to make sure they are still flexible mostly so you can stretch them. You can also tie pretty ribbons around the spine like I did in my halloween junk journal – hopefully that will help give you some ideas!